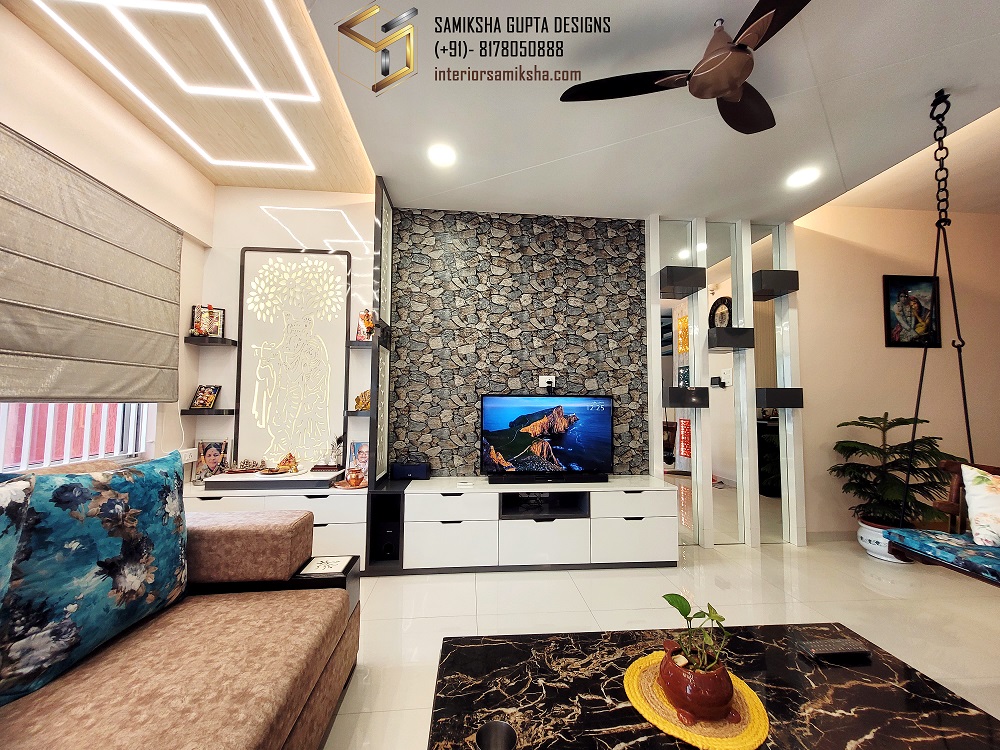
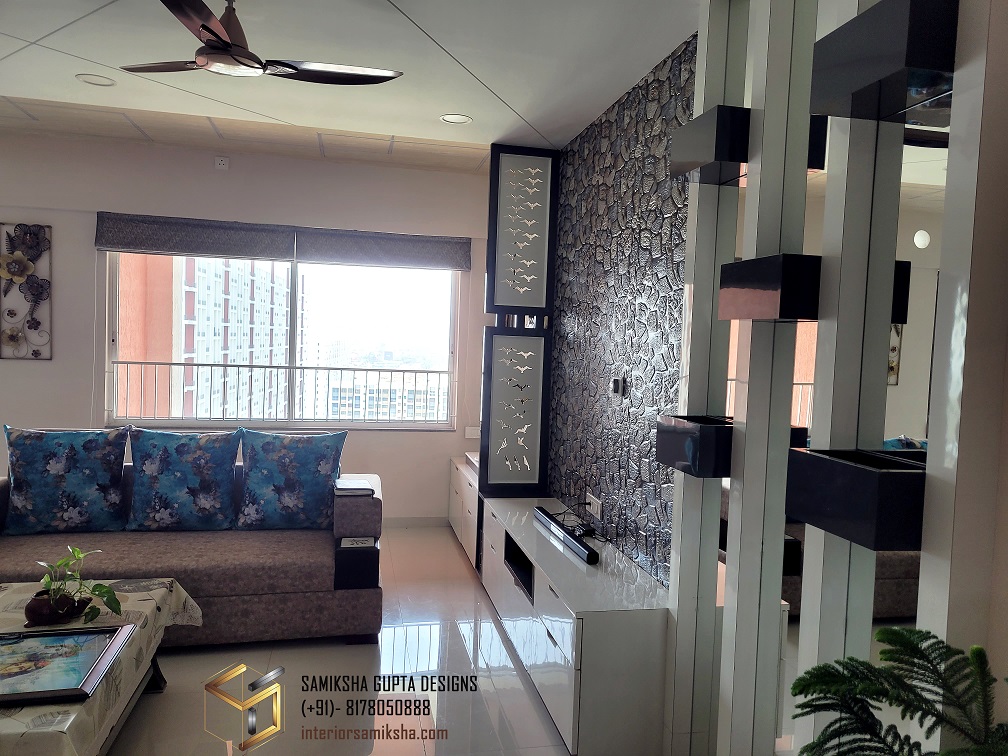
Every homeowner wants to make their home look stylish and modern. I did a 3BHK interior project in Hinjewadi, Pune, last year, where the client was adamant about using stone or tile on the TV wall. They saw some Pinterest images probably and became a fan of the rustic, yet modern look that stone cladding gives in the home interiors.
Now, cladding natural stone on a wall can sometimes not be feasible. They look good in photos or rendered images, but not so great when you have to put them up on your living room walls. Also, they look rich in bigger spaces, unlike the houses these days that have smaller room sizes.
So, I suggested they go for stone-looking tiles instead. Not only will it make the TV area look more attractive, but it will also protect the wall from moisture and heat. Nonetheless, I did my research before going all in with this idea.
I learned that there are a few things that need special considerations.
Let me share that knowledge with you.
1. Tile Weight and Type of Adhesive
TVs can be heavy, especially if they are large. Hence, adding extra tile weight to the wall can be risky. Hence, ensure that the TV is securely mounted to the wall before you choose to add additional weight to the area.
Use the best-quality adhesive only to attach the tiles to the wall. A high-quality, strong adhesive should be used to keep tiles in place so it doesn’t fall off the wall. Also, follow the manufacturer’s instructions when using the adhesive. They will guide you on how to use it correctly and safely.
2. Type of Tile
It’s important to note that not all tiles are suitable for areas with high moisture or heat, such as behind a TV. For instance, ceramic tiles are the first choice for many homeowners. However, they may not necessarily be best for a TV area since they are more prone to chipping if not properly installed. Also, they’re at risk of cracking or falling off if they are subjected to frequent vibration from the TV.
Rather, it’s better to go for a tile that’s not just more durable, but the ones that can withstand the heat and moisture that come with a TV area. One of the great choices for such areas is porcelain tiles. They are more resistant to chipping and can withstand higher temperatures and moisture levels.
Choose the vendor for laying tiles wisely. Only go with a professional. Any newbie can cost you a lot of damage. Steer away from cheap labours. I only have the best labours in my team for such delicate work. That’s how I was able to successfully clad these stone-finish tiles on the TV wall without any breakage.
One more popular option is the glass tiles. But of course, they are not too friendly on the pocket and may require a delicate installation process which not everyone can do professionally.
3. Installation Process
The first thing that needs to be considered before cladding the tiles behind your TV is the tile weight and the kind of adhesive used to attach the tiles to the wall. Also, understand the process of sticking tiles on the wall. Just FYI, do not start with cladding the tiles directly on the smooth wall. Either remove the putty and make the surface rough, or just do ply panelling first on the wall and then paste the tiles on the panelling.
A poorly installed tile can come loose and fall off the wall, damaging the TV itself, or someone in the room.
Once the wall surface is properly prepared, the tiles can be installed. Ensure that the tiles are cut in the right shape and sizes. Use only professional tools, like a tile cutter or a tile saw to cut the tile to size.
After that, apply the adhesive on the back of the tile and press it firmly onto the chipped wall. Use spacers if the tile size is big so that the tiles are laid out evenly spaced and properly aligned.
Because the tile size wasn’t very big here, I didn’t need to put in spacers or do the grouting here. Grouting would’ve ruined the overall stone-cladding look, anyway.
But if you’re not necessarily trying to get a joined look, you must fill in the spacers gap with grout once the adhesive is dry.
Smooth out the grout and remove the excess with a damp sponge. You can seal the tiles to protect them from stains and moisture once the grout is dried.
4. Consult a Professional
You may take up cladding the tiles behind your TV as a DIY project. However, you must do it safely and correctly. If you’re not sure about the installation process, it is best that you consult a professional or a tile installer. They can ensure that the tiles are installed correctly, which will not only save you time but also money and potential damages in the long run.
A professional contractor can provide you the advice on what are the right kinds of tiles that you should use, the right adhesive to use, and can guide you on the best installation process for your specific situation.
Before installing the tiles, a good tile installer will help you prepare the wall surface securely and correctly.
Additionally, a professional designer is a right person to understand if cladding the tiles behind your TV is even the best option for your home or not. They will assess your specific site situation and provide advice on other options as well, which may be more suitable for you, such as ply panelling, wallpaper or painting.
Final Thoughts
Sure, cladding tiles on the TV wall is a feasible option. However, you must consider all the factors that I have mentioned above in the article before you start the installation process. The weight of the tile, the type of the tile, the adhesive and the whole installation process are all critical aspects and considerations that you cannot overlook.
In case you’re not 100% sure about any of the aspects of the installation process or if you’re not confident in your DIY skills, it’s always best to have a professional involved. A professional can use their expertise to ensure that they install it properly.
Tile cladding on a TV wall adds visual interest and texture to the living room. With proper planning and execution, it can be a stunning addition to your home interiors.